
Today I am proud to share with you a project I have been working on for a while. Its a big one! I am going to show you how to make the perfect pair of pajama pants specifically for you! I start off by teaching you how to take the proper measurements, show you how to turn those numbers into a pattern, and then show you how to construct your ideal pajamas. There are a few different options with this tutorial, such as inclusion of pockets or not, and the choice between elastic or drawstring pants.

Supplies:

- 2 yds. Cozy Fabric (I used a flannel)
- Elastic (Option #1)
- Ribbon/Twill Tape (Option #2)
- Matching Thread
- Sewing Machine
- Pins
- Scissors
- Safety Pin
Supplies needed for drawstring: - Buttonhole Sewing foot
- Seam Ripper
- Disappearing Marker/Water Soluble Marker
- Measuring Tape
- Notepad and Pen
- Large Paper
- Rulers
- Yardstick
- Flexible Ruler
- Basic Ruler
- Scissors
- Tape
- Pencil and Eraser
- Calculator
Step 1: Cut two of pattern piece Leg Front out of the fabric.

Step 2: Cut two of pattern piece Leg Back out of the fabric.

Step 3: Cut four of pattern piece Pocket out of the fabric.

Step 4: Pin the pocket piece right sides together about 2 inches down from the top of all 4 leg pieces. The sides opposite the curves.

 |
| You want to make sure your pockets line up evenly on both legs, like so. |
Step 5: Sew the pockets to the legs using a 1/4-1/2 inch inseam. Pick one and stick with it for the rest of the project. I went with 1/2.

Step 6: Now pin the front of one leg and the corresponding back of the leg together, right sides facing. Pin all the way down both sides of the leg. Do not sew any part of the curved sections.

 |
| Sew down one side. |
 |
| Then sew down the other. Repeat with other leg. |
 |
 |
| Then stuff one leg into the other, like so. |
 | |
| Pin all around the curve, making sure to line seams up. |

Step 9: Now your pants are all sewn together, turn them inside out and lay them flat on a surface.
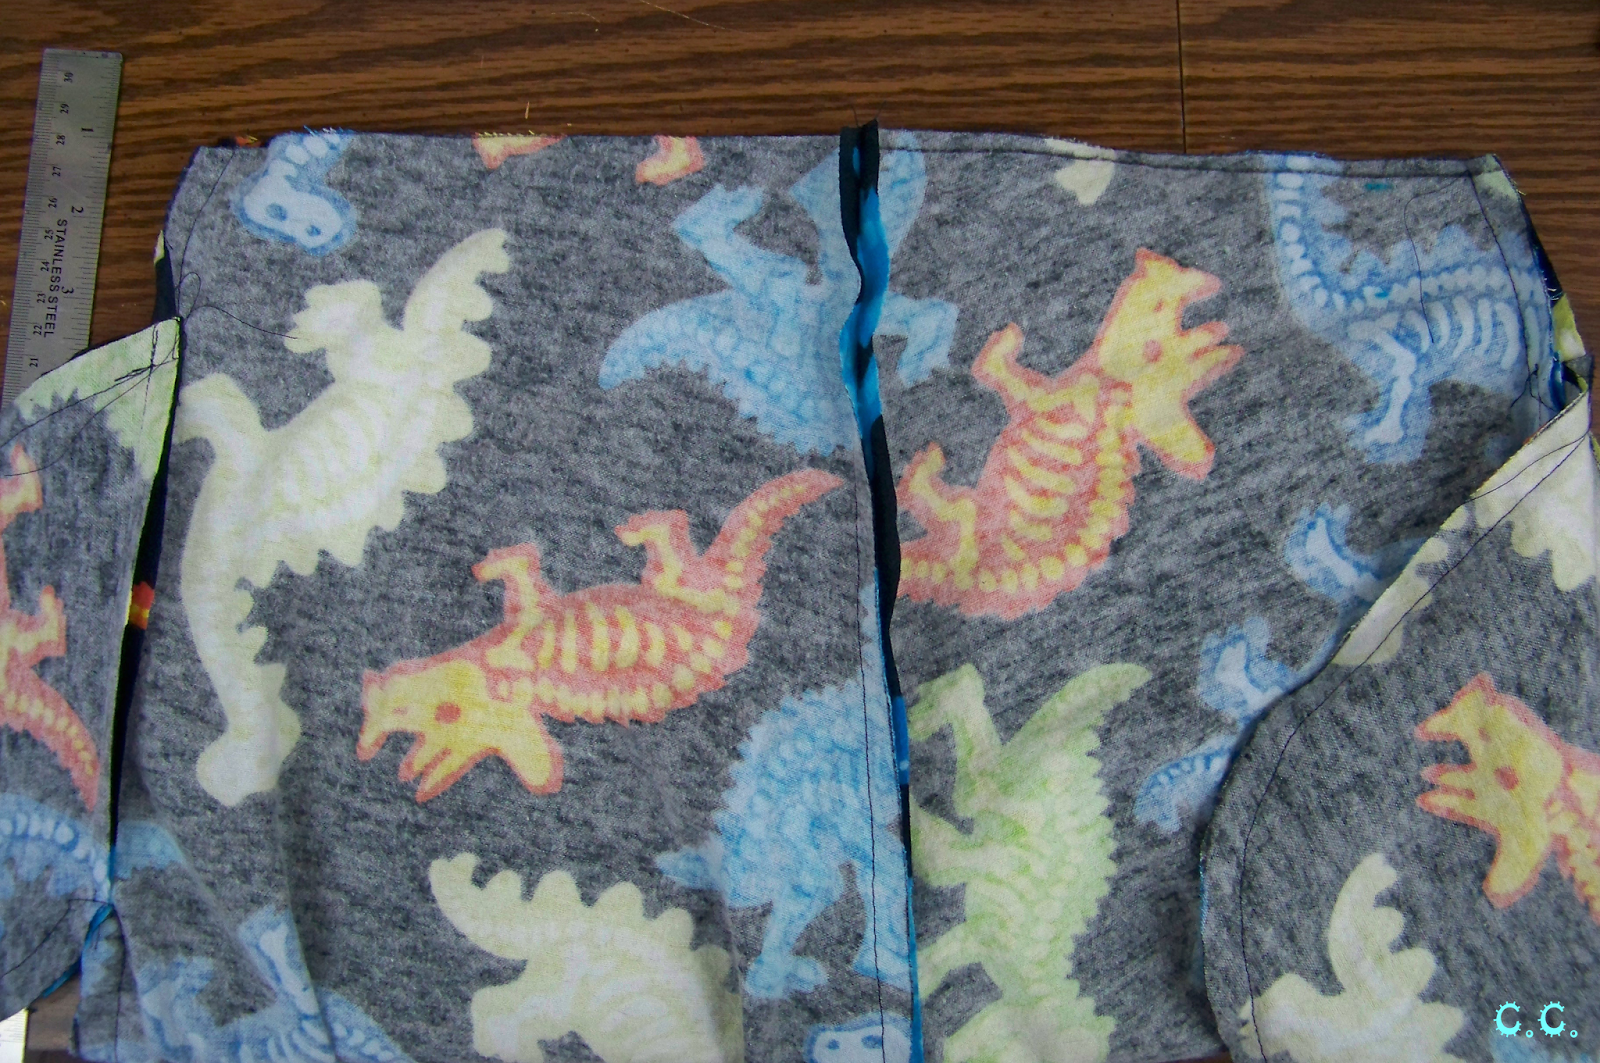 | |
Mark a line 1/4 of an inch from the top of the waist all the way around.

Fold your fabric down on that line and pin it down, all the way around the waist.

These next few instructions are only if you want to have drawstring pants, if you want elastic-waisted pants skip down to step # 12.
Step 10: We are going to estimate what out waist band is going to look like but not actually pin it down for sewing, just a few pins for a temporary hold. I folded the top of the waist down until it was even with the top of the pockets.

The I flipped the pants inside out and on the front side I marked lines for my drawstring holes.
 |
| Make sure the lines falls inside the waistband on the back, that's why we folded it. |
Step 11: Unfold the waistband as you had it temporarily pinned down. Now use your buttonhole foot to make your holes for you. Mine had lines that I can line up with any buttonhole I have have drawn. It was very useful.

Now put a pin through the top of the buttonhole and through the bottom, then use your seam ripper to slice the hole open. Careful not to cut any of the threads!


Step 12: Fold your waistband down until it touches the top of your pockets. I found it easiest to just fold it over, remove the pin holding the 1/4 inch fold and then replace said pin through all 3 layers of fabric.

Once you are down pining your waistband down you can sew around the waistband. Don't sew it shut entirely yet though. Leave a 2 inch gap. I placed the edge of the band right at the edge of my presser foot.


Step 13: Now thread either your elastic or your drawstring through that small gap.
 |
| I find it easiest to just attach a safety pin to the end and use that to pull. |
If you want a drawstring waist you are going to want a piece of string that is 10 inches longer than your waist measurement. When you thread the drawstring though the waistband you will only have to go as far as the closest hole, but then you have to do the same on the opposite side.
Once you have finished you can sew that 2 inch gap shut.

Step 14: Now try on the pants and see where the legs hem comfortably. Pin all the way around each leg hole.

Then sew around each leg hole.

After all that hard work you deserve to relax in your new pants! After you show them off of course!

Even though this model is clearly not me, I do plan on making myself a few pairs Including an exact copy of these(Who can resist neon dinosaur skeletons? Not this girl.), and a pair with this adorable navy flannel with white scissors all over it, that I've been saving for a great project. I actually owed my room mate this pair of pants for spilling some bleach on his favorite pair of batman pajama pants in the horrible bathroom bleach disaster of '13.
I hope these instructions help you make a new favorite pair of pajama pants! They are what I wear most of the time when I'm not at work! I am super lazy unless I have to be dressed for something.
P.S. I made myself a pair!

I hope you enjoyed the tutorial! If you have any questions, feel free to ask me below!
Til Next Time,

P.S. I linked up here.

I love how in-depth this tutorial is! And the print on the pants is so fun :D
ReplyDeleteI love the print too! This tutorial took forever to make/edit together. I hope in the end it just all makes sense XD
Delete